Hi :)
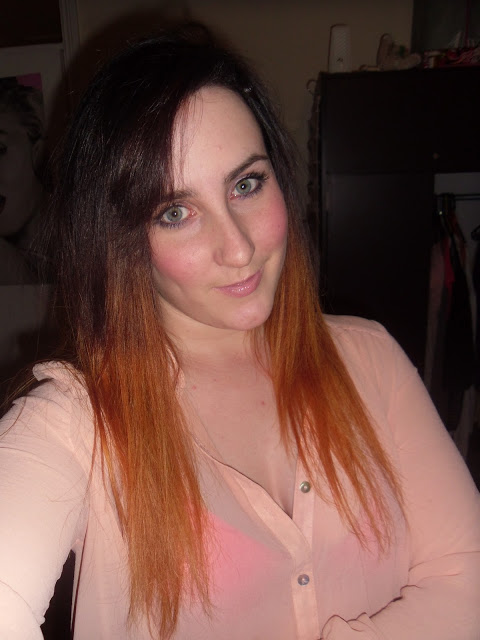
So, if you follow me on TWITTER you might have noticed me tweeting about doing my hair last night. Well, I did. It involved bleach/peroxide..... scary words to a lot of people, so I decided to track my process with pics for you lot. I had an idea of what I wanted to do and that was go dark on top and light on the ends - otherwise known as Ombre. I like to DIY, so I did! Here's how it turned out. In real life it's not as red toned. The tips are more of a strawberry blonde.
Ok so here we go. This is what my hair looked like before. THIS is how I got my hair from dark to this colour. (very much faded since then though)
Here are the products I used (which I bought in boots):
- Schwarzkopf LIVE Color XXL in the shade 89 Bitter Sweet Chocolate (€7.29)
- Jerome Russell Bblonde Cream Peroxide (12% strength 40 vol) (€2.29)
- Jerome Russell Bblonde Powder Bleach (€4.90)
Out comes my old faithful Lidl hair dye top! I find it particularly handy because it's a zip top so it's handy to take off when product is in the hair and it also has a collar to shield the product from my skin. It's also fleecey and nice! :)
I used my own latex gloves (well I robbed em from my mammy who's a nurse Thanks mam!). The ones that come with these box set are fairly ridiculous and I knew I would need some sort of specific placement - especially for the bleach.
First I went in with the brown dye and done the usual but just left the ends. I wanted to leave them as light as possible for the bleach to take to. I left it in for 30 minutes as I wanted to make sure it went completely dark so that I won't be getting roots! Here's how that turned out.
- Next was the Bblonde-ing! 1 pack of bleach for one bottle of peroxide. I just mixed it in a chinese take away box - classy buurd I am!
- I applied this to my tips (about 2-3 inches) and covered it in tinfoil to enhance the heating and lifting process. I left this for about 20 minutes.
- I then took off that foil and re-applied more and moved it further up to about midway length of my hair. I also applied a little to some front layers. I covered up in tinfoil again for another 20 mins.
- I then diluted the rest of the mixture and streaked it though everything I had done. (not sure if this made a massive difference but it seemed like a good idea at the time!) I left that for about 10 minutes
- I then rinsed it out. Shampooed my hair, used the conditioner from the brown hair dye and left it for about 10 minutes, rinsed and dried.


And BAM, that was it! It's not very gradient looking though. I can't seem to photograph the difference between the tips and the middle bit. My hair is quite resistant to lightening so perhaps this is as far as it goes. It says you can leave it on for up to 90 minutes but I didn't want to go blonde or damage my hair any further. I may throw in a bit of toning shampoo and see what that does. Will keep you updated!
You can kind of see the lighter colour to the left further side compared to the reddish tone at the from right. Also tried to show you below.
For now I'm happy with the change. Not bad for under €15 eh!!? I hoping I won't have to touch it now for a while as my roots should be about the same colour as the dye I used. Fingers crossed it won't fade out like last time! What do you think? Yay, nay? Thanks for reading :)

.png)


